• About
    • Who the hell I am and what I do
    • FAQ
    • Work with me
      • Services
      • Speaking & Training
  • Blog
    • All blog posts
    • Cocktails
    • DIYs
    • Recipes
    • Reviews
    • Social Media
    • Policy
  • Press
  • Contact

Danielle Hatfield

DIY :: Sonoma-Cutrer Wine Crate Shelving

June 26, 2010 By Danielle Hatfield 5 Comments

26 Jun
Share


I was visiting my friend and client Ben Roberts, owner of The Undercurrent Restaurant in Greensboro, NC, last week and we were discussing the big screen TV he has since installed in the Wagner Room and the fact that he needed to find a storage unit for the AV equipment.

He mentioned that he needed a something that could hold all of the AV components but would fit the decor of the restaurant . . . so I suggested using wine crates. Yep, big ole wood wine crates.

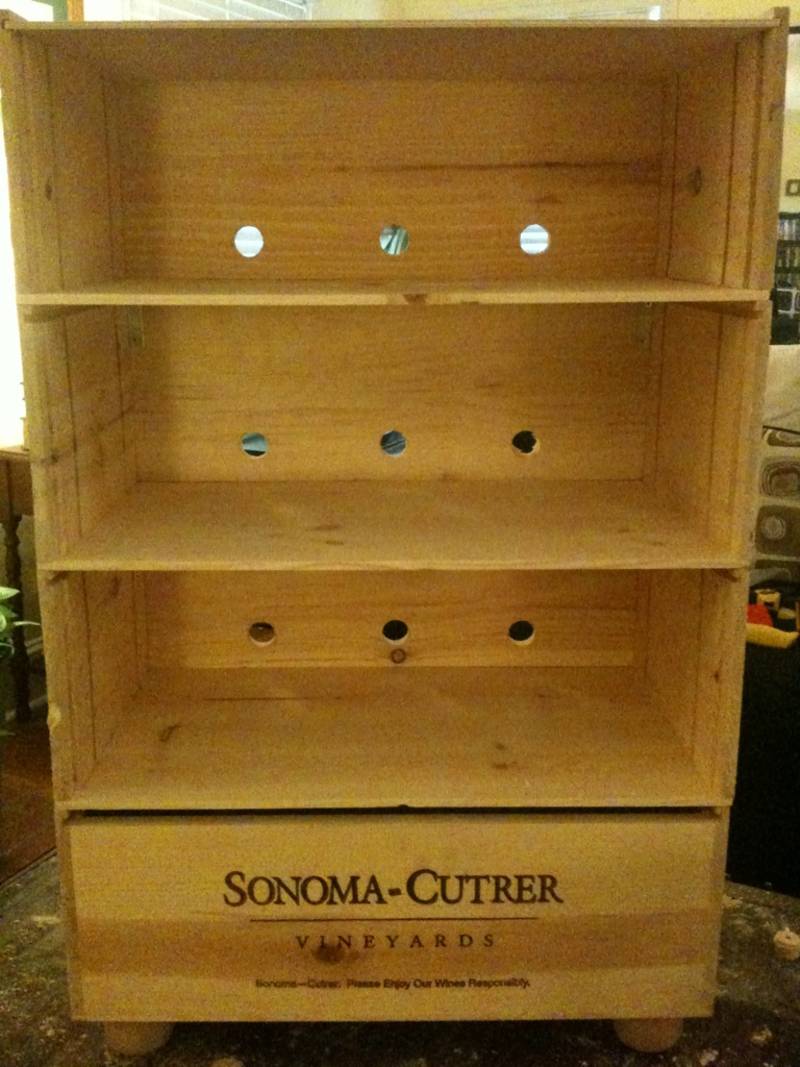
Needless to say Ben LOVED the idea and provided me with 4 Sonoma-Cutrer wine crates. You KNOW I was excited at the opportunity to re-purpose the materials and build it! So off to my favorite home improvement store I went! (I couldn’t have done it with out you Lowes!)

Skill level for this project is beginner.

Let’s look at the list of materials you will need ::

Black & Decker Cordless Drill
1 1/4″ finish nails
4 2 1/2″ Corner brackets
Gorilla Wood Glue
Durham’s Water Putty
1 1/4″ dia. wood hole saw
4 furniture feet (the size I used is not listed on Lowes website)
4 Waddell Straight Top Plates
Flathead screwdriver
Pliers
Tape measure
Pencil
1/2″ wood chisle
4 Sonoma-Cutrer wine crates

These wine crates measure 24″ wide x 13 3/4″ deep x nearly 9″ high
First order of business is to dig out the staples along the front panel of 3 of the 4 crates. This is where you will spend the majority of your time.
Once you have dug out the staples and pulled them free with the pliers – the front panels are easy to free from the sides and bottom as there is no glue used in the construction.
I have taken the sliding shelf from the bottom crate, scored it and glued it to the bottom of the
crate for added thickness for the screw plates.
The added thickness will also add stability for weight of the rest of the boxes we will stack on top.


Score the tops and bottom edges of the crates and apply wood glue. Once the crates are nestled one on top of the other use your finish nails at an angle to secure crates together.

Take out the sliding tops to the middle two crates and set aside for a future project. Use your corner brackets to connect the tops & bottoms of crates.
*you will need 3/4″ screws for the top brackets to keep them from punching through the bottom.


Be sure to measure at least 1″ from the bottom of the crate up.

Because Ben will use this for housing AV equipment I have drilled holes not only for the plugs but also to vent heat created.
Mix up your water putty and mix in the saw dust from your drilling.

Cover up your gouges with your watter putty and let dry thoroughly before sanding.

And voila! I great way to re-purpose wine crates from your favorite winery!

Find the Undercurrent and Sonoma-Cutrer and Lowes on Facebook.

So . . . what fun DIY projects have you done lately?

Content Protection by DMCA.com

Filed Under: DIY, Eco Friendly Furniture Tagged With: reclaimed furniture, Sonoma-Cutrer, Wine Crate Storage

About Danielle Hatfield

Owner/Chief Dirt Digger at Experience Farm - DIYs, recipes and sharing my 2 cents on social media

By Category

by date

Search

Previous Post: « The Writer
Next Post: I Do Declare: new new new!! »

Primary Sidebar

I love to share recipes, DIYs, and my two cents on social media.

I am also proud to be the Chief Dirt Digger at Experience Farm where I have worked with my partner and husband Brandon Pierce since 2009.

  • Facebook
  • Instagram
  • LinkedIn
  • Pinterest
  • Twitter

Help me keep my website ad free!

Follow on Instagram

Categories

Archives

subscribe for email updates!

I’m so proud to be part of this book!

Popular posts

  • Recipe: Clara’s Depression Era ‘Poor Man’s Meal’
  • How to save your iPad from the loop of doom : A true story of patience and curse words
  • The History of Haint Blue
  • Recipe: Black River Creole Baked Okra
  • Sew Sexy: How to remove a cowl from a sweater

Content Protection by DMCA.com

Follow @dhatfield

Copyright © 2025 Danielle Hatfield